How to Use Feedboon
A complete walkthrough from project creation to AI-powered bug fixing.
Estimated time: ~10 minutes for full setup. 2 minutes if the widget is already installed.
1. Sign up and create your first project
- Go to app.feedboon.com and sign up with email or Google
- Click “New Project” on the dashboard
- Enter your project name (e.g. “My Website”) and the site URL
2. Install the widget on your site
Add a single script tag to your website, just before the closing </body> tag:
<script
src="https://cdn.feedboon.com/widget.js"
data-project="YOUR_PROJECT_ID"
async
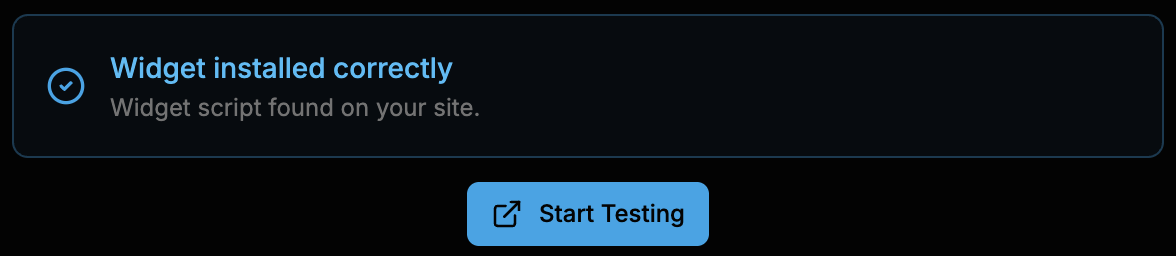
></script>After the widget is installed, click the “Verify” button in your project settings. You'll see a “Widget installed correctly” confirmation and can start testing right away.
For framework-specific instructions (Next.js, React, etc.), see the full Widget Installation guide.
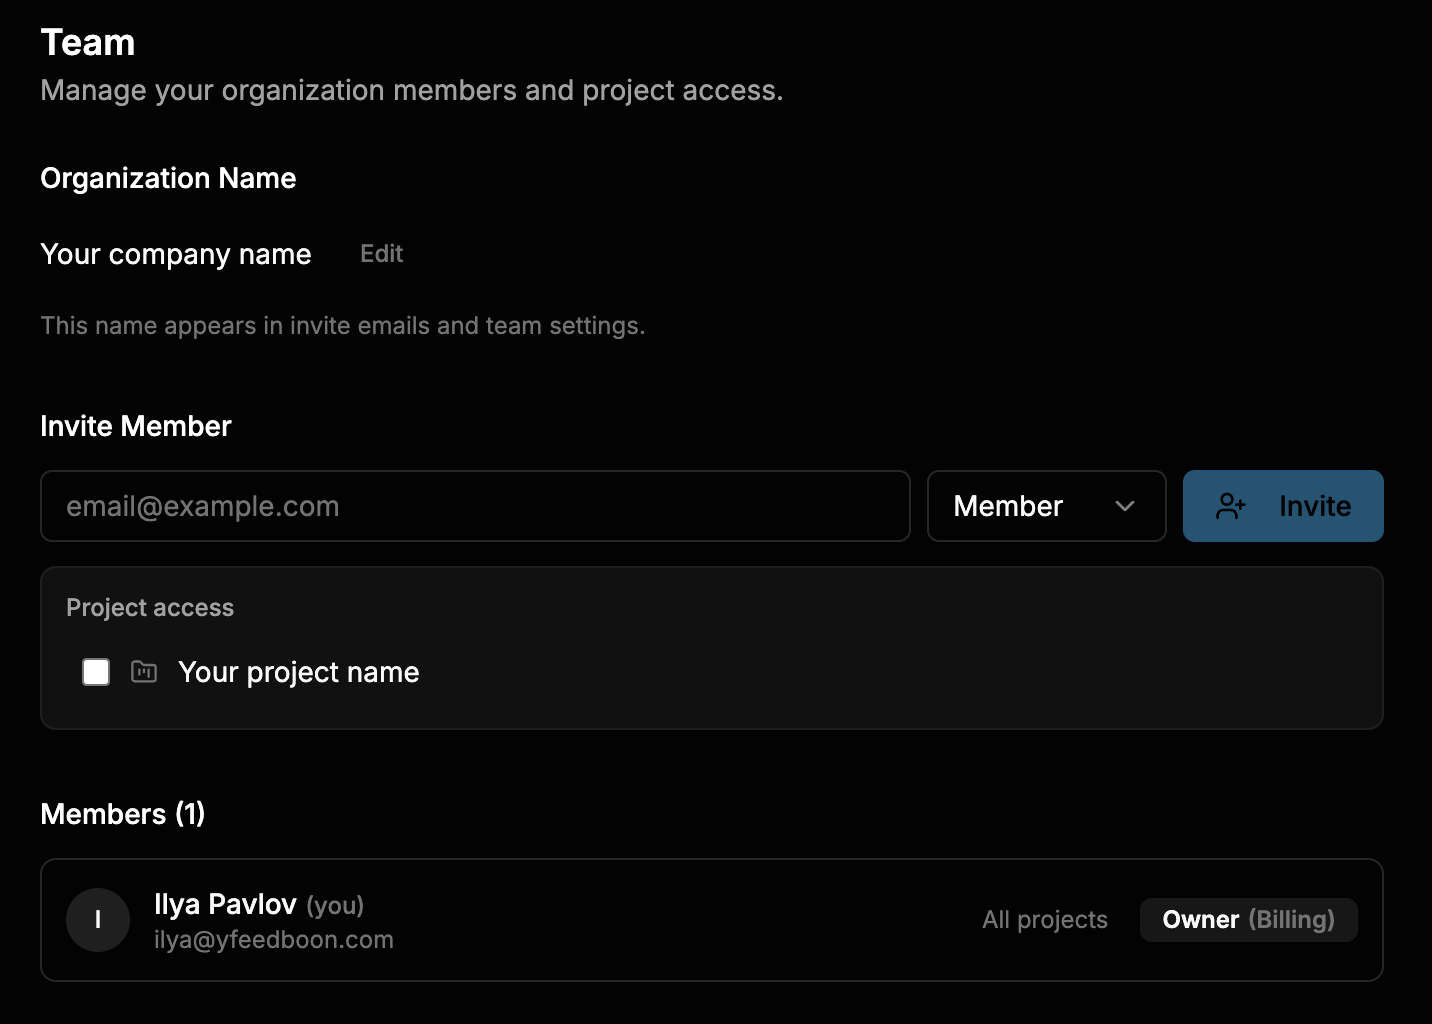
3. Invite your team
Team members need access to your project to see the widget and report bugs.
- Open your project in the dashboard
- Go to Settings → Team
- Enter a team member's email and click “Send Invite”
- They receive an email with a link to accept and join
- Once accepted, the widget appears for them automatically on your site
4. Report a bug
This is the core Feedboon experience. Once the widget is installed on your site:
Activate feedback mode
Click the bug button in the bottom-right corner of your site. The widget is visible to team members via the "Start Testing" link in your dashboard. You can also enable public mode in Settings so any visitor can submit feedback.
Click on any element
Your cursor changes to a crosshair. Hover over elements to see them highlighted with a red outline. Click the element with the issue.
Describe the issue
A small form appears near the clicked element. Describe the bug and select a priority level: Low, Medium, High, or Critical.
Submit
Click Submit. Feedboon automatically captures a screenshot with a pin marker at the click point, along with browser info, viewport size, and any console errors.

Tip: After submitting, a colored pin stays on the page showing the bug's status. Other team members can see all pins and click them for details.
5. Manage feedback in the dashboard
All reported bugs appear in your project dashboard. You can switch between a Kanban board and a list view.
Kanban board
The default view organizes feedback into status columns. Drag cards between columns to update status:
When you change a bug's status in the dashboard, the pin color on your site updates in real time.
My Website
FB-012
Buy button not responding
FB-013
Image not loading on product page
FB-009
Contact form not sending
FB-007
Checkout total shows wrong price
FB-005
Logo misaligned in header
FB-003
Footer links broken
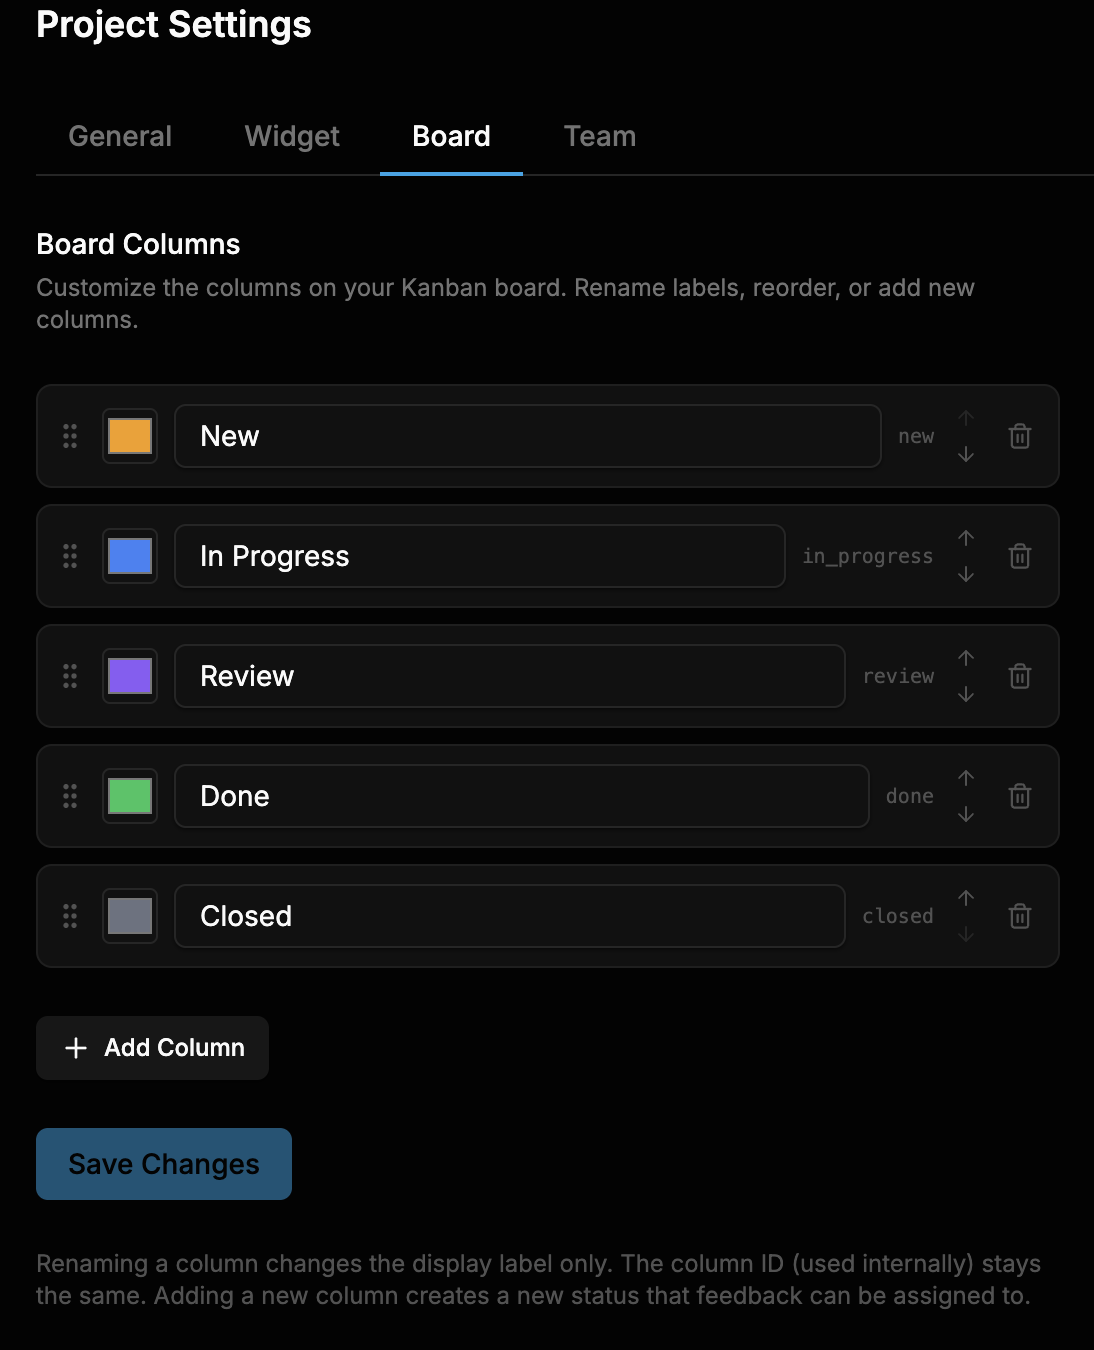
Customize your board
Go to Settings → Board to customize the columns on your Kanban board. You can rename labels, reorder columns, add new statuses, or remove columns you don't need.
Feedback detail
Click any feedback card to see the full detail view, including:
- Full-size screenshot with the click-point pin
- Browser, OS, and viewport information
- Console errors captured at the time of the report
- Comment thread for team discussion
- Status and priority controls
Buy button not responding
Clicked 3 times, nothing happens. Console shows an error.
Page
/checkout
Element
button#submit
Browser
Chrome 120 • macOS
Console Error
TypeError: Cannot read property 'id' of undefined
at checkout.ts:45:12
Comments (2)
Looks like a null check issue in the checkout handler
Fixed in commit abc123 — added null check for order object
6. Connect your AI editor
Feedboon's MCP integration lets you view and fix bugs directly from Claude Code, Cursor, or OpenCode.
- Create an API key in Account → API Keys
- Add the MCP server config to your editor
- Ask your AI assistant to list, view, and fix bugs from Feedboon
- Mark bugs as done without leaving your editor
> Show me all new bugs from Feedboon

Found 3 new feedback items in My Website:
  FB-012  Button broken     /checkout   High
  FB-013  Image 404         /products   Medium
  FB-014  Form not sending  /contact    Low

> Fix FB-012 and mark it as done

Analyzing checkout.ts:45...
Applied fix. Updated FB-012: New → Done
For detailed setup instructions, see the MCP Setup guide.